

Know how you can reuse an old cardboard box to create a jeweler or a small furniture to organize makeup.
When they are bought shoesmany people discard boxes to have more space in their cabinets. However, instead of throwing them to the trash, they can be given thousands of new usessuch as a organizer for accessories, Makeups, School suppliesamong other elements.
As well as this object, there are many ideas that will have a beneficial impact For him environment and for the waste reduction. However, they will also serve to have the home more and more unique and creative elements.


How to transform a shoe box into an organizer
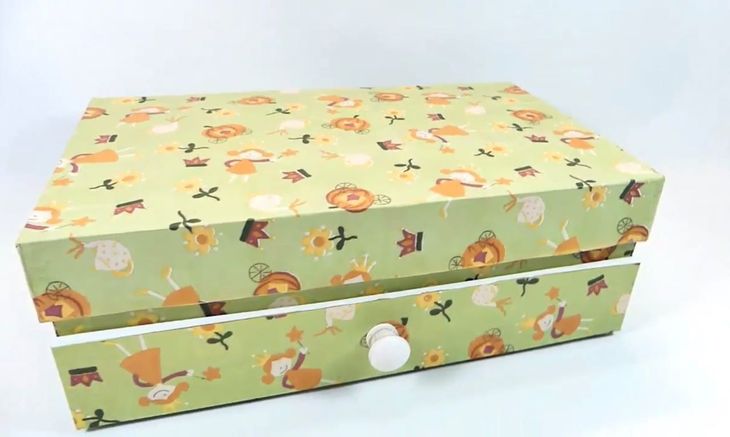
Organizer with shoes box
In order to create this organizer, first of all, it is necessary to obtain all the materials. These are:
- Shoes box with built -in lid
- Corrugated cardboard pieces
- White or carpenter plasticola
- Decorative paper
- Kraft paper
- Brush
- Hot silicone
- Pencil and rule
- Scissors and cutter
Once all the elements were achieved, it is time to follow this series of steps:
- Open the box and take a measure of 5 centimeters at the front from below. Draw a rectangle and cut it with the coter.
- Cut out the outstanding flaps and paste the sides To the box.
- Stretch corrugated cardboard and paste it behind the front to reinforce your stability. This has to be of the same measure as the upper rectangle that remained in the box. Cover this rectangle with a piece of Kraft paper To finish strengthening it.
- Paste rectangles of Kraft paper on the sides of the box to smooth and strengthen.
- In order to create the second drawer, the Interior measure and cut a rectangle according to these so that you can enter and leave easily. This must be repeated to cut All sides of the drawerincluding its lid, that it is not necessary that it fully inside the box. You can also cut smaller rectangles so that it has divisions internal
- Line All drawers in the drawer with decorative paper and paste them with hot silicone To assemble it. Check that you fit inside the box to verify if you have to make modifications.
- Cut one more rectangle of the size of the inside of the box to create the SECOND FLOOR and place it above the drawer without paste. You can also make small divisions.
- Once the entire interior is ready and lined, the time will come to line the entire outside of the box. If it has any brandKraft paper can be glued before lined so you don’t notice. When the decorative paper is hit on the roof of the box, it is recommended to let it dry with a weight on top of that it gets wet.
- Once the organizer is dry, he will be ready to start save everything you want.
Source: Ambito
I am an author and journalist who has worked in the entertainment industry for over a decade. I currently work as a news editor at a major news website, and my focus is on covering the latest trends in entertainment. I also write occasional pieces for other outlets, and have authored two books about the entertainment industry.


