
A bicycle breakdown is particularly annoying if you do not have the right bicycle tool to hand. Read here which tools are important in an emergency and what you need in the event of a breakdown on vacation.
There are some things that the air shouldn’t be blown out of. Relationships are part of it. Even the playground equipment for ball sports can be properly inflated and sunk much better in the opponent’s net or basket. However, airlessness regularly causes particular frustration among an estimated 30 million cyclists in Germany. Hardly anything is more annoying than a flat tire on the way to work, to daycare, on a weekend trip or even on vacation. And anyway: breakdowns on the bike make you in a bad mood. Especially if you have the wrong bike tool or no bike tool at all.
In the following article you will find out what you should have with you on every bike tour and which tools are the quickest to help with which breakdown.
Flatfoot: This bicycle tool is important for this
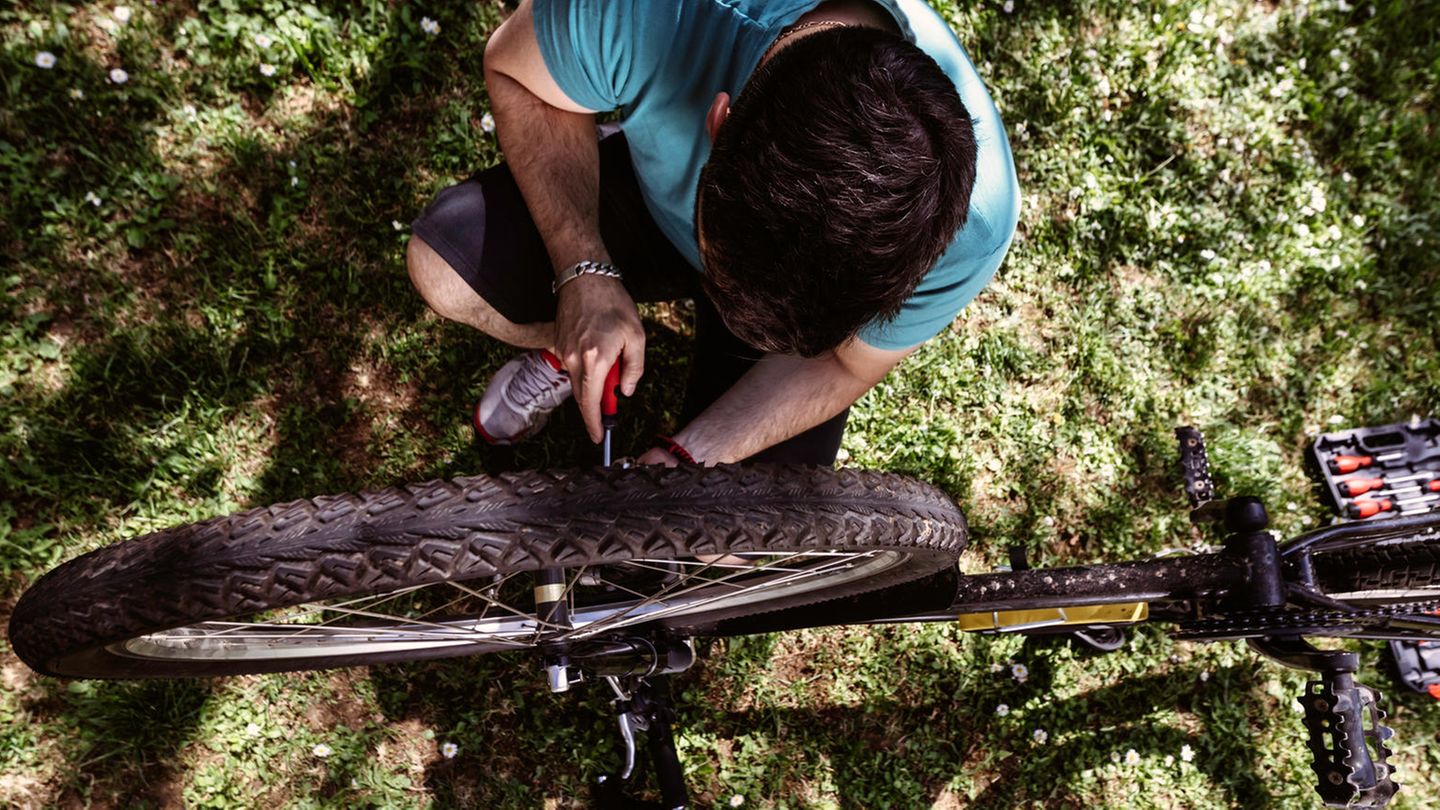
The undisputed number 1 of bicycle punctures is the flat tire. Mountain bikers, small and large racing cyclists, but also cyclists with city bikes are affected every day. Flat is flat. Now you could connect the bike to a suitable place and use public transport to go home or to work. With the right tool, you can fix the mishap yourself in just a few minutes. Usually enough for this , a – and of course . Are practical too , because the hands usually do not stay completely clean during this action. And the small bike tool kit is best stowed away by clever cyclists in a detachable one .
Tip: Make sure your air pump is compatible with the valves on your bike. A distinction is made between wheels with car valves and the classic so-called French valves (also known as Sclaverand valves). Many air pumps are now compatible with both variants.
Do-it-yourself: Der Frühjahrs-Check
Especially if the bike has been in the cellar for a long time over the winter months, some important functions should be checked before the first spring trip. Because appointments with trusted bicycle dealers are currently few and far between, you can provisionally help yourself here as well. These parts and functions should be controlled by you and this is the tool you need.
1. Brakes
The brakes are a cyclist’s life insurance. They should work smoothly. And that literally. To check the function, it is sufficient to lift the front and rear wheels once, get them moving by hand and first check whether the wheel is running cleanly and centrally between the brake pads. Important: If there is only a millimeter or less left of the brake pad, it should urgently be replaced with a new one. Usually this works best with one . To do this, the brake pads are loosened and removed with an Allen key and replaced with fresh pads. Align the brake shoes so that they only touch the rim when the brake lever is pulled. Bikers whose bikes are equipped with disc brakes should deliver them to the bike dealer if problems arise. A current one read here.
2nd chain
If it squeaks and creaks in the ears of cyclists, this is usually the chain’s call for help. Day after day, it collects dust particles in basements that stick to them. In addition, the important lubricant gradually dries out. Those who have no shelter are also struggling with flash rust and weather damage. The chain tension can also decrease if the bike is not used for a long time. To check the chain wear is a (Chain wear gauge) helpful. This indicates whether there is still enough tension on the chain. If this is the case, the chain should first be cleaned and then with the highest possible quality be lubricated. For spring bike cleaning, it is worth cleaning with a.
Hobbyists who want to replace the chain on their bike themselves need one , one and some individual chain links. Here is a available.
3. Circuit
Do you have a bike with a gear hub? Congratulation. This type of circuit is relatively low-maintenance. Even a few weeks of rest can hardly harm her. It looks a little different with derailleur gears. Similar to the chain, the moving parts, i.e. the pulleys, the small springs and the derailleur, suffer in particular. Important: Use water sparingly when cleaning the rear derailleur. This creeps into all the cracks and flushes out lubricant in places where it is absolutely necessary. A used toothbrush is the better choice for the coarse dirt. Then a few splashes of oil on the drive parts. Finished. In this all important tools are included. Setting or readjusting the circuit should be left to a professional for laypeople. If you have no experience with this, you might break more here.
This article contains so-called affiliate links. Further information are available here.
I am Pierce Boyd, a driven and ambitious professional working in the news industry. I have been writing for 24 Hours Worlds for over five years, specializing in sports section coverage. During my tenure at the publication, I have built an impressive portfolio of articles that has earned me a reputation as an experienced journalist and content creator.


