
Baby boomer nails are the nail polish trend of the year. How to conjure up the natural look on your nails and what you need for it is shown by the star.
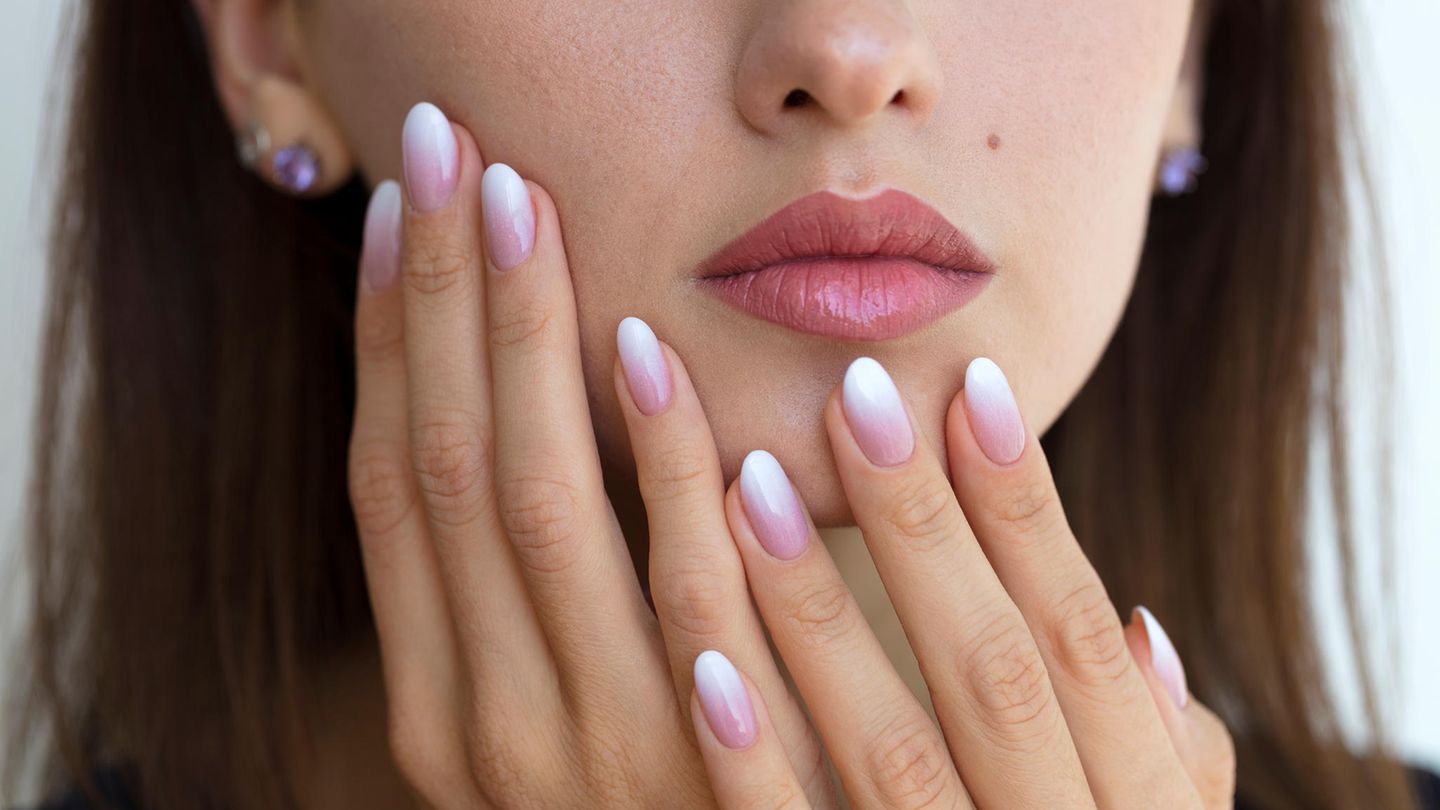
The classic French manicure has a little sister: baby boomer nails. This nail trend is not only elegant, but also incredibly versatile. Instead of the typical white tip and pink nail bed, which are sharply separated from each other, the baby boomers’ colors blend gently together. The result? A beautiful ombre effect that makes your nails appear longer and more well-groomed without being obtrusive.
The looks particularly natural. The nails start with a soft pink or nude on the nail bed and transition into a delicate white at the tips. This gradient technique gives your hands a classy but natural look – and the best thing about it? It goes with everything, be it a business meeting, a date or a relaxed afternoon with friends.
Where does the trend come from?
The baby boomer nail trend is not new, but has made a comeback in recent years. It originally became popular in the early 2000s and is named after the baby boomer generation. This generation valued a well-groomed but understated look – a style that is back in fashion today. The baby boomer look is basically a tribute to the classic French manicure, but with a soft, modern twist.
If you want to try this trendy look yourself, go for it! It’s not as difficult as it looks. All you need is a little patience, a steady hand and the right materials.
Baby Boomer Nails: What You Need
Step 1: Preparation
File your nails into the desired shape – oval, round or square, whatever you like. Then smooth the surface with a buffer. Then apply a base coat to protect your nails and create a perfect base for the design. Let the polish dry under the dry.
Step 2: The Base
Paint the nail bed with the pink or nude . Allow this layer to dry thoroughly. Use a UV lamp here too. Be patient: you don’t want unsightly streaks on your nails.
Step 3: The Ombre Effect
Now comes the exciting part: Apply a small amount of the white nail polish to a sponge or and gently dab it onto the nail tips. Slowly work your way towards the nail bed until you have a smooth transition. Repeat this step as needed to achieve the perfect color gradient.
Step 4: The finishing touches
After the ombre effect has dried, apply a top coat to seal the design and make it shine. Again, use a UV lamp to dry. The is finished!
Step 5: Small corrections
If some nail polish has spilled, simply remove the excess polish with a cotton swab dipped in nail polish remover or a which comes with the Neonails set.
Baby boomer nails are not only a real eye-catcher, but also a stylish choice for every occasion. With their soft ombre look, they are a modern classic that combines elegance and simplicity.
More information can be found here.
Source: Stern
I am an author and journalist who has worked in the entertainment industry for over a decade. I currently work as a news editor at a major news website, and my focus is on covering the latest trends in entertainment. I also write occasional pieces for other outlets, and have authored two books about the entertainment industry.


