
save energy
Seal windows: This keeps the cold outside – and the heat inside
When it gets colder outside, the heating season begins in many households. But despite the artificially generated heat, there can be a draft in some rooms, especially near windows.
So-called drafts are caused by leaks that arise exactly where different materials meet – for example at the window. Since wooden frames in particular work all year round (they expand when it’s hot and contract when it’s cold), small joints are created between the seals and the natural building material. And it is precisely through this that the cold air can flow unhindered from outside into the interior of the apartment, which in turn means that the radiators have to generate even more heat. This is not only noticeable in the energy costs, but also in the frame: the moist air makes it easy for mold to grow. You can avoid both in good time if you seal your windows. You can find out what you need to consider here.
Draft test: How to detect leaky windows
To find out whether a window is leaking, you can use a trick: close all doors and then light a candle (alternatively, a lighter works). Run these along the inside of the window frame. If it starts to flicker, you have discovered a leak. If you are not comfortable with the fiery experiment, you can also use a piece of paper: place it on one corner of the (open) frame and close the window again. If you can easily pull out the sheet, it is likely that there is a leak. Especially if you tighten the screws with an appropriate tool and still get the same test result. Then it’s time to seal the windows.
Which materials are suitable for sealing?
There are now a variety of different materials that are suitable for sealing windows. Self-adhesive sealing tapes made of foam, rubber seals, silicone or acrylic as well as window putty have proven particularly useful. But what are the differences between the various options and what advantages or disadvantages do they bring with them? An attempt to explain follows:
Rubber or foam sealing tapes
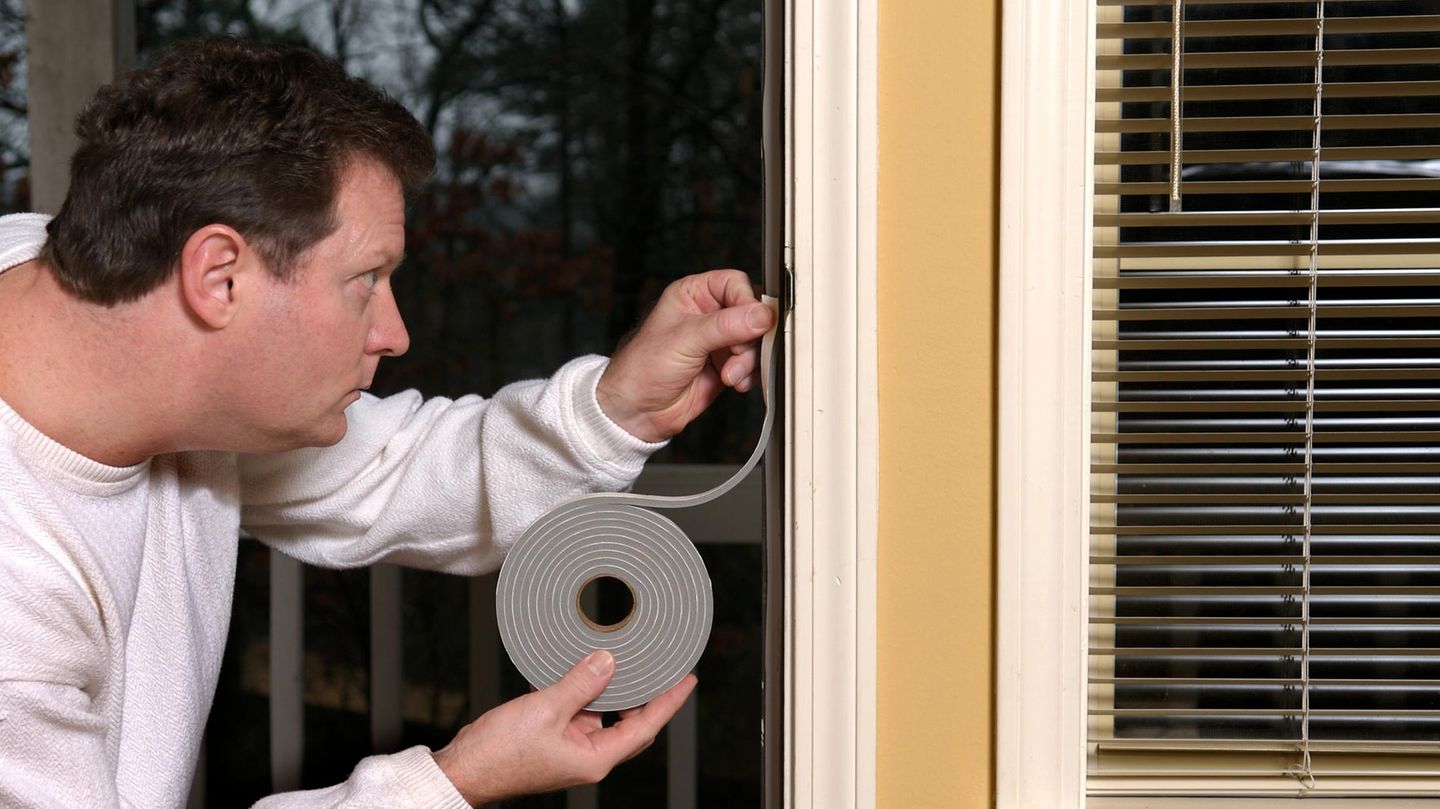
The self-adhesive tapes can be ordered in different colors and shapes (width and length are variable) and can also be cut, i.e. shortened, afterwards. They are particularly suitable for window frames made of wood or metal to seal leaks. The advantage of sealing tapes is clearly the low price, but they last significantly longer (up to eight years depending on the manufacturer) than foam seals, which only offer a short-term problem solution of one to a maximum of two years. Assembly is child’s play for both.
To find out how wide the seals need to be, you should measure the frames in advance. The best way to determine the gap is to wrap ordinary plasticine in cling film (alternatively, felt or paper works) and then place it between the frame and the sash – and close the window briefly. If you choose rubber sealing tapes, you can choose between E-profiles for narrow joints and P-profiles for wide joints. Self-adhesive foam sealing tapes are also available in different sizes and colors ( and ) available.
Important:
If your windows are made of plastic and already have prefabricated rubber seals, no more may be glued over them!
Silicone and acrylic
Even with these two sealing options, the difference lies in the details: While their consistencies are quite similar, they have or a rather shiny and a rather matt texture. The first material is water-repellent and elastic, while the second can be easily painted over – which is particularly important for wooden windows, for example if they need to be repainted. However, if you want to seal the windows in the bathroom, silicone is the best option the better choice – as it does not let water through even in damp rooms.
Window putty
The linseed oil-based adhesive and sealant was used decades ago – and is still suitable today for wooden windows that were sealed with the material. Because although Although it is waterproof and environmentally friendly, it doesn’t last very long. For this reason, leaks need to be repaired every now and then. To do this, the old putty simply needs to be heated, for example with a hairdryer, removed from the joints and refilled. The material is as elastic as plasticine and can easily be shaped into the desired shape. It then takes a few days for it to dry.
Sealing windows: These are the most important steps
Although sealing windows is certainly not rocket science, the following tips can help you achieve a clean result:
-
Before you get to work, you should clean the window frames and the joints. Light dirt can be removed with water and detergent; for stubborn areas you can use alcohol, for example.
-
The old seals and adhesive residue must then be removed. A spatula can be useful here to remove the residue. You can also oil any wooden fittings.
-
If you would like to seal your windows with silicone, you can press some cling film or paper onto the material and moisten it with soapy water. Then close the wing so that the silicone can dry.
-
Rubber seals are suitable for plastic windows: depending on the gap width, these should be between one and 3.5 millimeters thick. When attaching it, it is important that the straps fit tightly at the corners.
- When you’ve finished sealing the window, you can use the draft test described above to make sure you’ve sealed all leaks and haven’t overlooked any gaps.
And one more tip at the end: Ideally, you should seal your windows not only from the inside, but also from the outside – because there can also be weak points through which cold air can get into the interior of the apartment. However, finding the leaks is much more difficult, so it’s best to concentrate on the obvious cracks.
*This article contains so-called affiliate links to products in online shops. If a user clicks on it and buys something, the publisher receives a commission from the retailer, not the manufacturer. There is more information about this .
Source: Stern


