Light meters are available in almost every camera. Nevertheless, a separate measuring device can make photography easier. But how do you expose correctly and which light meters are suitable for this?
Exposing a photo correctly is not that easy. Sure, every modern camera has an integrated light meter. But in certain situations it weakens because it is usually the so-called Objektmessung undertakes. This means that it measures the light reflected from the object and suggests the aperture, shutter speed and ISO setting to the photographer as he sees fit. Unfortunately, the integrated light meter has no idea what exactly you want to photograph and how, and to top it all off, cameras only “see” in black and white. Therefore, the exposure meter is set to always assume a medium gray scene in which white, gray and black are balanced.
But what if that is not the case and, for example, you are photographing a snow-covered forest that is predominantly white? Well, in the worst case, the snow in the image would be gray because the camera’s exposure meter incorrectly identifies the white snow as medium gray and the photographer then suggests aperture, shutter speed and ISO as if the white snow in the image were just gray. So the camera would underexpose the photo. In order to fully understand this process, it helps to understand the zone system of the American photographer Ansel Adams (February 20, 1902 to April 22, 1984).
The Zone System by Ansel Adams
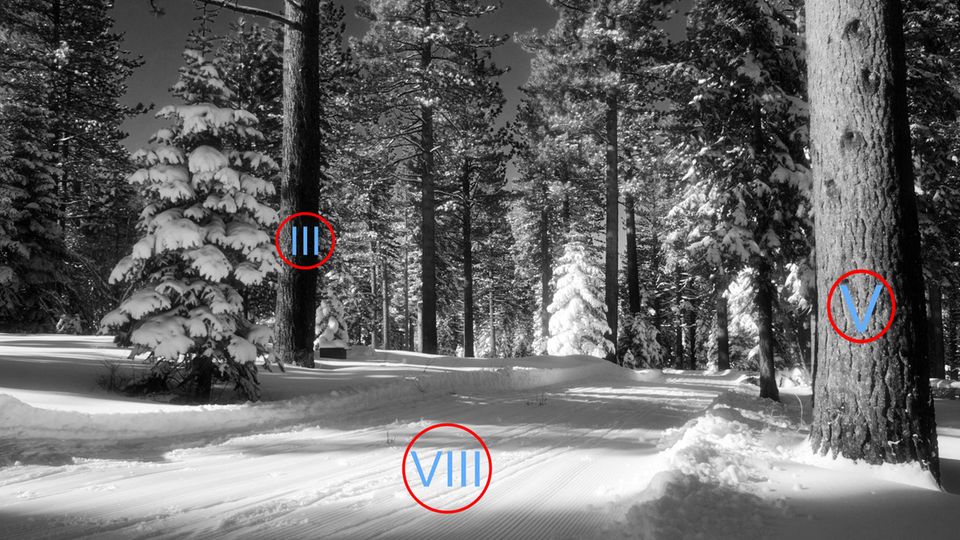
Adams divided the spectrum from black to white into eleven zones. “0” is deep black without structure, “X” is bright white without structure. The values ”I” (black) and “IX” (white) are also without structure. With structure everything is in between, ie “II” to “VIII”. Important: Each value is one exposure level apart. To understand how the photographer helps, an example is necessary. Let’s stay with the snowy forest:

If you photograph this scene as the integrated light meter indicates, you run the risk of underexposing the picture. This happens when you measure the light in the center of the image (red circle VIII). The light meter thinks the white snow is medium gray. Now you need to balance the exposure levels from gray (V) to white (VIII) by manually adding three exposure levels. This can of course be achieved with a wider aperture, a longer shutter speed, a higher ISO setting or a combination of everything. If you have oriented the integrated light meter to the tree on the right (V), everything is good. Your camera’s suggestion should fit because the gray is very close to the center of the zone system.
If the measurement was taken on the tree in the background (III), you would have to underexpose two levels in order to take a reasonably exposed photo. Put simply, you just have to keep in mind that the camera sees the measured exposure level in gray – regardless of whether it is it in reality. But if it is lighter, increase the exposure, if it is darker, reduce it – always by the corresponding levels of the zone system. Gray cards are therefore useful for measuring exposure with the camera. These are kept in the gray mid-tone (V). Will the held in front of the object to be photographed, the camera’s exposure metering is calibrated to the gray of the map and is thus perfectly adjusted.
Light meter: what you need it for
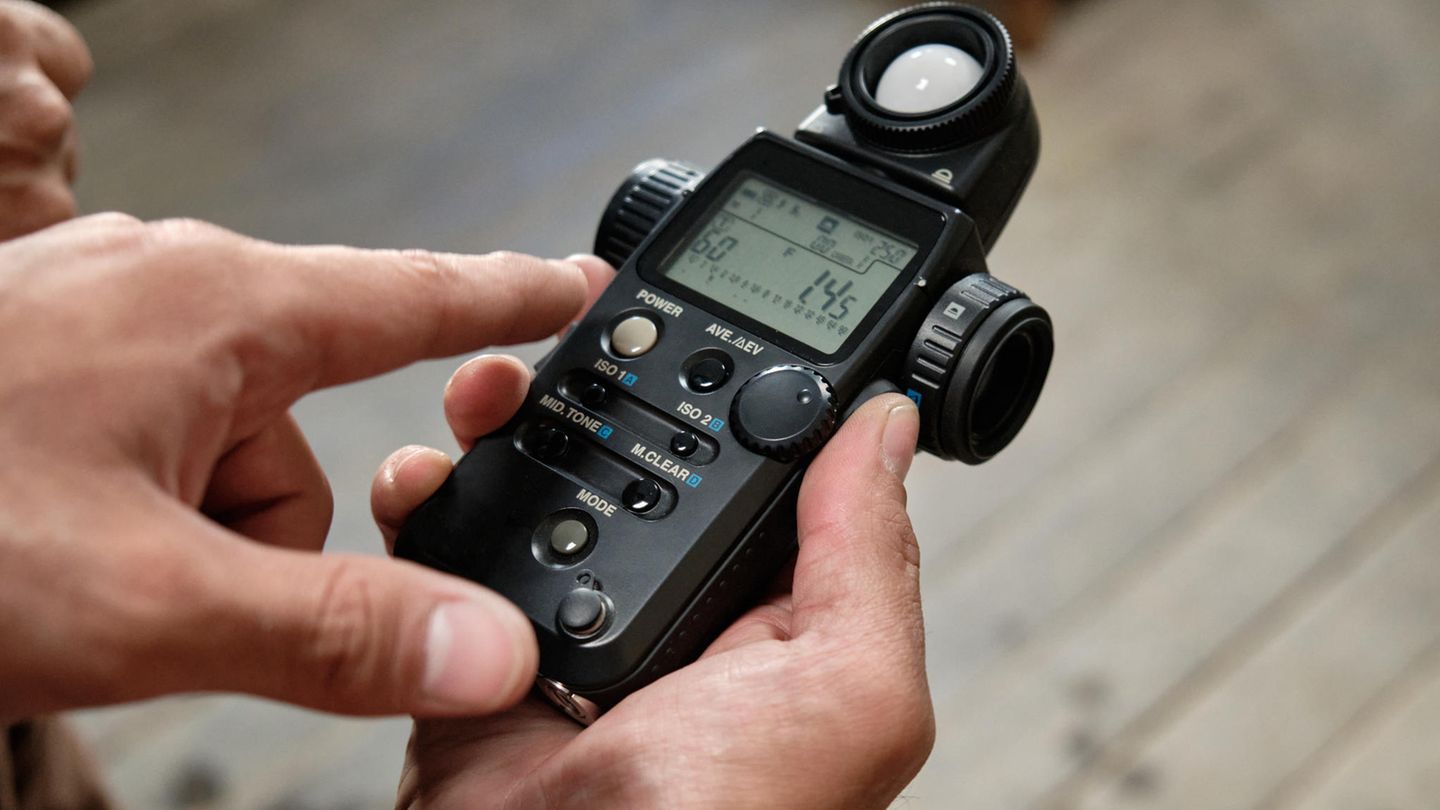
So why use an external light meter? Well, amateur photographers really don’t need that. Good light meters cost between 300 and 400 euros. Money that should be better invested in bodies, lenses or tripods. Advanced photographer: inside, a light meter makes work easier – or rather accelerates it. But only if you put in a lot of work beforehand. But first things first: So what does a light meter do? There are three measurement methods for light measurement, we are already familiar with two:
- The object measurement, the measurement of the light that is reflected from the object to be photographed.
- The gray card measurement: Here a gray card is held in front of the subject and the camera is held on the gray card from a distance of around 20 centimeters. Be careful not to cast a shadow on the gray card.
- The light measurement, i.e. the measurement of the light that falls on the object. The so-called exposure level is measured here. And that’s exactly what you need a light meter. The result is independent of the object brightness, which is why objects that deviate from medium gray are displayed in the correct tone.
And a light meter is needed precisely for light measurement. It is held in front of the object to measure the incident light and then spits out the ideal ISO, aperture and shutter settings for the camera – provided the exposure meter is correctly calibrated. And that saves time and nerves, especially when it comes to post-processing digital photos. Analog photographer: inside it saves from disappointment with underexposed or overexposed photos. Let’s take a look at recommended exposure meters before we calibrate them properly.
Recommended exposure meters
The Sekonic dominates the exposure meter market. The devices from the Japanese manufacturer are particularly impressive due to their easy-to-understand operation and accurate measurement.
For beginners and analog fans: Sekonic L028
This is completely sufficient for beginners . It is particularly nice that you can attach the light meter to the holder for flashes if you want to take object measurements with it. Its operation is almost self-explanatory: insert the battery and click on the gray button on the back to check whether the battery is charged. You can tell by the fact that the red needle on the front moves into the blue area.
Then set the camera’s ISO setting in the exposure meter. To take a light measurement, you need to hold the light meter’s lumisphere from the subject towards the camera lens. Then press and hold the measurement button on the right side until the red needle stops moving. Now turn the ring of the exposure meter to the left until the green and red needles are on top of each other, so that you can then read off the various combinations of aperture and shutter speed – done.
Digital Lichtmesser: Sekonic LiteMaster Pro
A digital exposure meter is a bit more modern and significantly more expensive. Of the The range of functions is more aimed at professional photographers. This becomes clear in various measurement modes such as a wireless flash mode, priority modes for exposure time, aperture or a combination of both, several cinema modes and many more. The exposure meter also offers settings for exposure compensation and frame rate settings. Beginners: inside photography (and also many advanced users) the range of functions is likely to confuse rather than help to shoot a reasonable picture. If you are a beginner who buys this exposure meter anyway, you have to be prepared to study the manual carefully.
Light meter for the smartphone
On the other hand, exposure meters for smartphones are cheaper but not necessarily bad. One of the most famous representatives of this genus is . The small measuring device connects to the iPhone via the lighting adapter. You can use the associated app to read out the measured values and then snap the photo. It’s that easy.
Calibrate the exposure meter correctly
Once you’ve decided on a light meter, you still need to properly calibrate it. Important: Use the camera you work with most often. Why? Well, that’s because every camera is really different. And the manufacturers differ even more from one another. ISO 400 at Nikon is somewhat different from ISO 400 at Sony or Fujifilm and so on, because the International Standards Organization (responsible for ISO values) allows deviations of up to a third of the f-stop. In addition, the aperture specifications on lenses are not always as precise as the manufacturers claim.
This means that you go out with your light meter and camera and find a subject that you like. Then snap a picture with the settings that the light meter specifies. Then take several overexposed or underexposed pictures, always a third of a step higher or lower. With a digital camera, this information is usually stored with it. Analogue photographers should make notes of which picture was taken on the film with which settings. Then look at the photos either on the computer in post-processing or developed and pick the perfectly exposed image from your eyes. Write this value down on the lens in a post-it manner. Then go on a photo tour again and take several pictures in different situations. Of course, you measure the light again beforehand.
This time, however, you do not set the camera according to the exact specifications of the light meter, but always the steps higher or lower that appeared to you to be perfect during the first photo session. If the photos look perfectly lit again, you can set the value in the exposure meter so that in future it always immediately shows the value that is right for the body and lens. Repeat the process with any other bodies and lenses you have.
David William is a talented author who has made a name for himself in the world of writing. He is a professional author who writes on a wide range of topics, from general interest to opinion news. David is currently working as a writer at 24 hours worlds where he brings his unique perspective and in-depth research to his articles, making them both informative and engaging.


